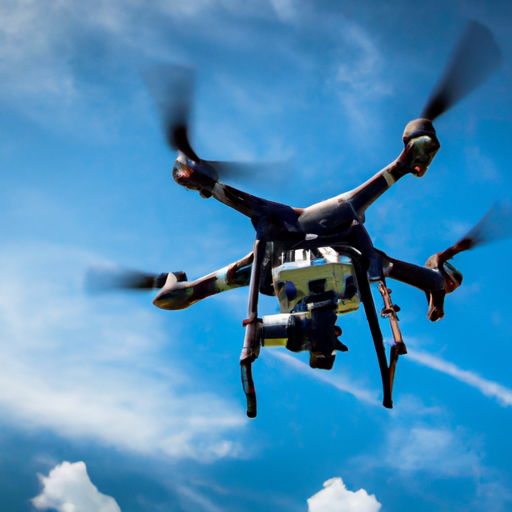
If you’ve ever wondered how to achieve that breathtaking cinematic look in your drone footage, look no further! In this article, we will explore the key techniques and tricks that can take your aerial videos to the next level. From camera settings to composition, lighting to post-processing, we’ll cover everything you need to know to capture stunning and cinematic drone footage that will leave your viewers in awe. So grab your drone and get ready to elevate your videography skills to new heights!

Choosing the Right Drone
When it comes to getting cinematic looking drone footage, one of the first things you need to consider is choosing the right drone. There are several factors to take into account when making this decision, but three key aspects to focus on are the camera quality, stable flight, and the range and battery life of the drone.
Consider the Camera Quality
The camera quality of your drone plays a vital role in capturing stunning and cinematic footage. Look for drones that offer high-resolution cameras with the ability to shoot in RAW or log formats. These formats provide more flexibility in post-production, allowing you to adjust the exposure and color grading to achieve the desired cinematic look. Additionally, drones with built-in image stabilization technology can significantly enhance the overall image quality, reducing jitters and vibrations.
Look for Stable Flight
Stable flight is essential for capturing smooth and cinematic footage. Drones equipped with advanced flight stabilization systems, such as GPS and gyroscopes, ensure steady flight, even in windy conditions. Look for models that have features like obstacle avoidance and intelligent flight modes, which can assist in maintaining stability and avoiding collisions. Smooth flight is crucial for achieving professional-looking footage, so make sure to prioritize this aspect when choosing your drone.
Evaluate the Range and Battery Life
The range and battery life of your drone are crucial factors to consider, especially if you plan on capturing cinematic footage that requires long-distance flights or extended flight times. Look for drones with ample range capabilities, allowing you to reach the desired shooting locations without losing the signal. Additionally, consider the battery life of the drone. Opt for models that offer a longer flight time, as it will provide you with more opportunities to capture stunning footage without constantly worrying about battery limitations.
Mastering Flight Control
Once you have chosen the right drone, it’s time to master flight control to capture cinematic footage. Understanding basic drone controls, practicing flying in different conditions, and utilizing intelligent flight modes are key aspects to focus on during your flight training.
Understanding Basic Drone Controls
Before taking off, it’s essential to familiarize yourself with the basic drone controls. Learn how to control the throttle (altitude), pitch (forward/backward movement), roll (left/right movement), and yaw (rotation). Spend time practicing these controls in a safe and open area until you feel comfortable maneuvering the drone smoothly and accurately. Knowing how to control your drone effectively is essential for capturing cinematic shots with precision.
Practice Flying in Different Conditions
To become adept at capturing cinematic footage, you must practice flying in various weather and environmental conditions. This will help you learn how your drone handles in different scenarios, such as windy conditions, low light situations, and confined spaces. By practicing in different conditions, you will gain confidence and be better prepared to adapt your flight techniques to capture cinematic shots in any setting.
Utilize Intelligent Flight Modes
Many drones offer intelligent flight modes that can greatly assist in capturing cinematic footage. These modes include features such as ActiveTrack, which allows your drone to autonomously track a subject, and Waypoints, which enable you to pre-program a flight path for smooth and precise movements. Experiment with these intelligent flight modes to enhance your footage and create dynamic cinematic sequences effortlessly.
Understanding Shot Composition
Shot composition is a fundamental aspect of capturing cinematic looking drone footage. By utilizing the rule of thirds, exploring different perspectives, and keeping the horizon level, you can create visually appealing and balanced shots.
Utilize the Rule of Thirds
The rule of thirds is a compositional guideline that suggests dividing your frame into nine equal parts using two horizontal lines and two vertical lines. By placing your main subject or points of interest along these lines or at their intersections, you can create a more visually appealing and balanced composition. When capturing drone footage, visualize your shot by dividing the frame into thirds and strategically positioning your subjects or elements accordingly.
Explore Different Perspectives
Drone footage offers unique opportunities to capture footage from elevated perspectives that would be otherwise inaccessible. To achieve cinematic shots, experiment with different angles and perspectives. Fly your drone low to the ground to capture dynamic movements or rise above for sweeping aerial shots. Additionally, try incorporating different camera movements, such as tilts and pans, to add depth and visual interest to your shots.
Keep the Horizon Level
Maintaining a level horizon is essential for achieving cinematic shots with a professional look. Uneven horizons can be distracting and disrupt the overall composition of your footage. Most drones offer built-in horizon leveling tools that can guide you in keeping your shots straight. Pay close attention to the horizon, especially when capturing aerial footage, and make adjustments as necessary to ensure straight and level shots.
Controlling Camera Settings
Controlling camera settings is crucial for achieving cinematic-looking footage. By understanding and adjusting the shutter speed, setting aperture and ISO, and experimenting with white balance, you can have more control over the exposure and overall aesthetic of your shots.
Adjusting Shutter Speed
The shutter speed determines the amount of time the camera sensor is exposed to light. In cinematic footage, using a slower shutter speed can create a desirable motion blur, giving your shots a more dreamy and smooth appearance. Experiment with different shutter speeds to find the right balance between capturing motion and maintaining sharpness in your footage.
Setting Aperture and ISO
The aperture controls the amount of light entering the camera lens, while the ISO affects the camera’s sensitivity to light. In cinematic footage, shooting with a wider aperture (smaller f-stop number) can create a shallow depth of field, allowing you to selectively focus on specific subjects or elements. Additionally, keeping the ISO low can minimize grain and noise in your footage, resulting in a cleaner and more professional look. Experiment with different aperture settings and ISO levels to achieve the desired cinematic aesthetic.
Experiment with White Balance
White balance determines the overall color temperature of your footage. Different lighting conditions can have varying color temperatures, and adjusting the white balance helps maintain accurate colors. Experiment with different white balance settings to enhance the mood and ambiance of your footage. For example, using a warmer white balance during golden hour can add a soft, romantic tone, while cooler white balance settings can create a more crisp and clinical look.

Utilizing ND Filters
Neutral Density (ND) filters are indispensable tools for achieving cinematic-looking drone footage. By understanding their purpose, benefits, and choosing the right filter strength, you can effectively control exposure and create visually stunning shots.
Understanding Neutral Density Filters
Neutral Density (ND) filters are darkened pieces of glass or resin that reduce the amount of light entering the camera lens. They are particularly useful in bright conditions or when shooting long-exposure footage, as they allow you to maintain proper exposure without overexposing the image. ND filters come in different strengths, measured in stops, and each strength corresponds to a specific light reduction level.
Benefits of Using ND Filters
Using ND filters offers several benefits when capturing cinematic drone footage. First, they allow you to maintain a slower shutter speed, resulting in smoother and more fluid movements. ND filters also enable you to shoot with a wider aperture, creating a shallower depth of field and achieving a more professional and cinematic look. Additionally, ND filters can help eliminate the “jello effect” caused by vibrations or propeller movements, resulting in cleaner and crisper footage.
Choosing the Right Filter Strength
Choosing the appropriate ND filter strength depends on the lighting conditions and the desired cinematic effect. ND filters come in various strengths, such as ND4, ND8, ND16, and ND32, each offering a different light reduction level. In bright, sunny conditions, a higher filter strength like ND16 or ND32 may be necessary to achieve the desired exposure. Experiment with different filter strengths to find the right balance between exposure and achieving the cinematic look you desire.
Mastering Movement Techniques
To capture cinematic-looking drone footage, mastering movement techniques is crucial. By focusing on slow and smooth movements, implementing manual gimbal control, and practicing different tracking shots, you can add a professional touch to your footage.
Slow and Smooth Movements
One hallmark of cinematic footage is slow and smooth camera movements. Instead of rapid and jerky motions, focus on smooth and deliberate movements when flying your drone. Slowly pan or tilt the camera to create elegant and fluid motions that enhance the cinematic feel. Avoid sudden changes in direction or speed, as they can disrupt the visual flow of your footage.
Implementing Manual Gimbal Control
The gimbal is a device that holds and stabilizes the camera on your drone. Most drones offer automatic gimbal stabilization, but to achieve cinematic footage, it’s essential to have manual control over the gimbal. This manual control allows you to adjust the camera’s angle, tilt, and pan during flight. By using manual gimbal control, you can compose shots more precisely and create dynamic movements that add depth and interest to your footage.
Practicing Different Tracking Shots
Tracking shots are an effective way to add visual interest and depth to your drone footage. Experiment with different tracking shots, such as following a subject or capturing smooth lateral movements. By keeping your subject in the frame while smoothly tracking their movements, you can create cinematic shots that draw the viewer’s attention and evoke a sense of realism. Practicing different tracking shots will enhance your skills as a drone pilot and result in captivating footage.
Using Lighting to Enhance
Proper lighting can greatly enhance the cinematic look of your drone footage. By leveraging the golden hour and sunrise/sunset, avoiding harsh midday lighting, and experimenting with shadows and contrast, you can create visually stunning and atmospheric shots.
Golden Hour and Sunrise/Sunset
The golden hour, which occurs shortly after sunrise and before sunset, is widely regarded as the best time for capturing cinematic footage. The soft, warm light during this time adds a beautiful and romantic quality to your shots, creating a visually pleasing and cinematic look. Take advantage of the golden hour’s gentle lighting and plan your drone flights accordingly to capture breathtaking footage.
Avoid Harsh Midday Lighting
Midday lighting can be harsh and unflattering, casting strong shadows and washing out colors in your footage. To achieve a cinematic look, it’s best to avoid flying your drone during the midday hours when the sun is at its highest point. Instead, focus on shooting during the golden hour or during other times when the lighting is softer and more forgiving.
Experimenting with Shadows and Contrast
Shadows and contrast can add depth and drama to your drone footage. Experiment with different lighting conditions to create interesting shadows that enhance the overall composition. Play with high contrast scenes, such as capturing a subject against a bright background or in silhouette, to create visually striking shots. By understanding how lighting affects your footage and creatively harnessing its potential, you can elevate your drone footage to cinematic levels.
Editing and Color Grading
Post-production is a crucial step in achieving cinematic-looking drone footage. By choosing the right editing software, enhancing footage with color grading, and applying cinematic transitions, you can polish and refine your shots to create a professional and visually captivating final product.
Choosing the Right Editing Software
Choosing the right editing software is essential to bring out the full potential of your footage. Look for professional-grade software that offers a wide range of editing tools, effects, and capabilities. Popular editing software options include Adobe Premiere Pro, Final Cut Pro, and DaVinci Resolve. Each software has its own learning curve, so invest time in learning the features and techniques specific to your chosen software to maximize the impact of your edits.
Enhancing Footage with Color Grading
Color grading is a powerful technique that can significantly enhance the mood and aesthetic of your footage. By adjusting the color temperature, contrast, saturation, and overall color balance, you can create a cohesive and visually striking look. Experiment with different color grading styles, such as warm tones for a nostalgic feel or desaturated tones for a more dramatic look. Color grading allows you to achieve a more cinematic atmosphere and to evoke specific emotions through your footage.
Applying Cinematic Transitions
Transitions are an effective way to add a professional touch to your drone footage during the editing process. Utilize cinematic transitions, such as crossfades or dissolves, to create smooth and seamless scene changes. Avoid using flashy or gimmicky transitions that can distract from the overall cinematic feel of your footage. Select transitions that enhance the visual flow of your shots and contribute to the storytelling aspect of your video.
Mastering Post-Production Techniques
To further enhance your cinematic-looking drone footage, mastering post-production techniques is essential. Techniques such as stabilizing footage, adding motion graphics or text, and syncing footage with music can elevate the quality and impact of your final product.
Stabilizing Footage
Sometimes, despite your best efforts, some footage may still come out shaky or unstable. But worry not – post-production stabilization techniques can salvage these shots. Most professional editing software offers built-in stabilization features or plugins that can help smooth out any unwanted jitters or vibrations. By stabilizing your footage in post-production, you can achieve a more polished and professional look.
Adding Motion Graphics or Text
Motion graphics and text can add a layer of professionalism and creativity to your drone footage. You can use motion graphics to highlight key points or locations, add visual overlays, or display additional information. Adding text allows you to introduce scenes, identify subjects, or convey messages in a visually captivating manner. When incorporating motion graphics or text, ensure they are seamlessly integrated into the footage and do not overshadow the cinematic nature of your shots.
Syncing Footage with Music
Music can greatly enhance the overall impact of your cinematic drone footage. Choose a fitting soundtrack that complements the mood and tempo of your footage. Sync your footage with the music by carefully editing and arranging your shots to align with the rhythm and pacing of the music. This synchronization creates a seamless and immersive viewing experience for your audience, enhancing the cinematic feel of your video.
Practicing Safety and Legal Regulations
When capturing cinematic-looking drone footage, it’s essential to prioritize safety and follow local drone laws and regulations. By learning and adhering to these laws, keeping distance from no-fly zones, and ensuring safe flying environments, you can capture stunning footage while maintaining a responsible and ethical approach.
Learn and Follow Local Drone Laws
Every country and region has specific laws and regulations regarding drone flight. It’s crucial to educate yourself about these laws and ensure full compliance to avoid legal consequences. Familiarize yourself with regulations related to drone registration, flight restrictions, altitude limits, and privacy concerns. Knowing and following the local drone laws will help you fly safely and responsibly while capturing cinematic footage.
Keep Distance from No-Fly Zones
No-fly zones are areas where drone flights are strictly prohibited for safety and security reasons. These zones can include airports, military installations, and other sensitive locations. Before taking off, research and identify any no-fly zones in your area to ensure you avoid flying your drone in these restricted areas. Respecting no-fly zones is not only a legal requirement but also crucial for maintaining public safety and security.
Ensure Safe Flying Environments
When capturing drone footage, it’s important to prioritize safety for yourself, others, and the environment. Always fly in open and unobstructed areas that provide ample space for maneuvering your drone. Consider weather conditions such as strong winds or rain that can affect the stability and control of your drone. Additionally, be mindful of potential hazards like powerlines, trees, or wildlife. By choosing safe flying environments, you can minimize the risk of accidents or damage to your drone and ensure a smooth and successful filming experience.
In conclusion, capturing cinematic looking drone footage requires careful consideration and mastery of various aspects. By choosing the right drone, mastering flight control, understanding shot composition, controlling camera settings, utilizing ND filters, mastering movement techniques, using lighting to enhance, editing and color grading, mastering post-production techniques, and practicing safety and legal regulations, you can achieve visually stunning and professional results. Remember to always prioritize safety, comply with local laws, and practice responsible and ethical drone flying. With practice, patience, and a keen eye for creativity, you can create cinematic masterpieces with your drone footage.


